![]()
|
STEP 2 : PRODUCING AND SAVING PICTURES
Before you begin page making, all the pictures you need must be present in your folder (see step 1). The picture's files need to be of JPEG (i.e. ".jpg") or GIF (i.e. ".gif") types. You can use Paint Shop Pro 4 or more for converting files.
| Using scanner, digital camera, or video card, you must save, on your hard disk, the digital pictures you need. They could be of different types (i.e. "bmp", "tif" etc.). We have to handle them to have suitable pictures for web pages. | |
 |
Start Paint Shop Pro by clicking (double) on the icon (or by "start", "program", "Paint Shop Pro" and "Paint Shop Pro") |
| Choose "browse" in the "file" menu. | 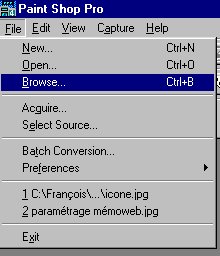 |
| Click on the folder you want to browse. | 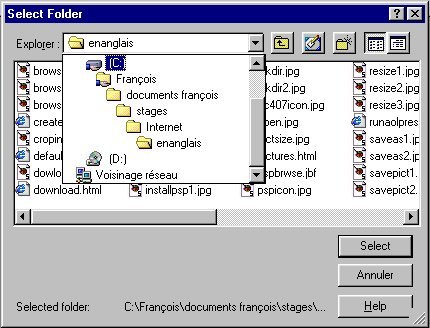 |
| Choose a picture by clicking (double) on its "thumbnail" picture. |  |
| When the picture is opened, look at its size on the right bottom corner. It mustn't be too big (for example no more than 640 x 480 pixels for a whole screen picture). | |
| If you want to keep only one part of the picture, select the part to be kept with the selection tool, dragging from top left corner to bottom right corner. | 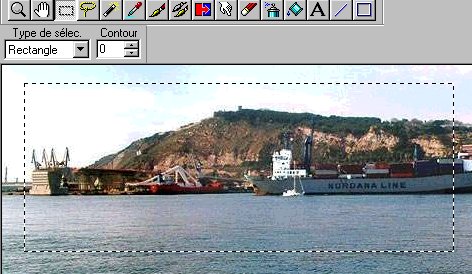 |
| Then use the "crop" command of the "Image" menu. | 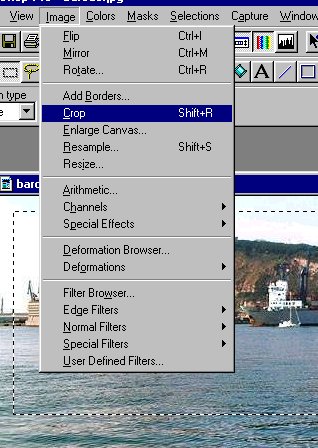 |
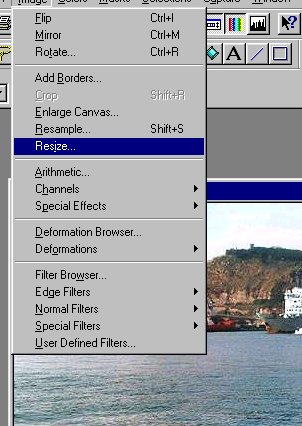 |
If you need to resize it click on "resize" in the "Image" menu. |
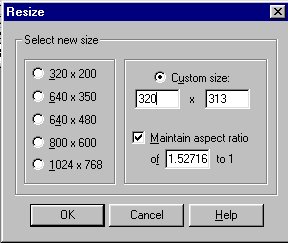
| In the "resize"
tool box, click on the right button. You only need to write the new size
of the picture. Please change "width" Or "height" and maintain
aspect ratio.
For best quality, use half, third or quarter of the previous size as new size. The picture appears with its new size by using zoom. You must have a 1:1 zoom rate to see the picture as it will be on your web page. |
 |
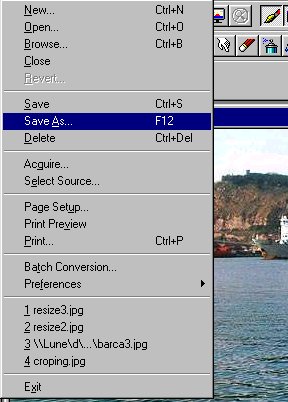 |
The picture is now ready to be saved. Use the "Save as" command of the "file" menu. |
| In the "save as" box, choose the good folder, the good file type (JPG or GIF) and enter a file name ending by ".jpg" or ".gif". You must only use small letters and numerals without having any space and using special characters. | 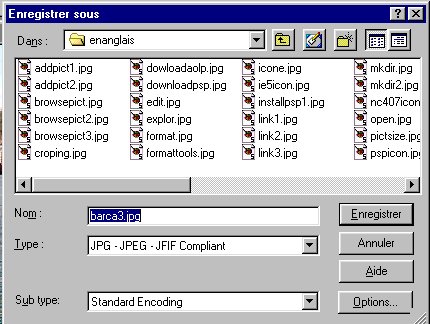 |
| STEP 1 | TOP | HOME | STEP 3 |
|